Overview
In part-one, we built our first GameOn Extension. This extension creates a simple window that prints the text “Hello World” when we click the extension Icon in the Extensions panel in the In-Game Overlay. In this tutorial, we will learn how to add items to the Window that can add functionality. We will add several buttons and some text.
What you’ll need:
GameOn Developer Toolkit (v200501) or later.
or any Coding IDE (we recommend Visual Studio Code)
Step One: Our Window
In part-one of the tutorial, we created a button event that opened a window to print the text “Hello World”.
//create an activity on button press
            button.activity(new activity)
            {
                new GameOnOverlay.Window(MyWindow)
                {
                    //Print the text "Hello World"
                    new TextLabel = TextLabel1();
                    TextLabel1.Text.String = "Hello World";
                }
            }
We can re-use some of this code. We still want to create the new Button Activity and target a new GameOnOverlay Window. We want to remove the Text Label and the code to change the label text.
//create an activity on button press
            button.activity(new activity)
            {
                new GameOnOverlay.Window(MyWindow)
                {

                }
            }
To keep things simple and organised, we will create the graphical user interface of the window in another code file. To do this, we will want to decide on a name for the process and add it to the code. Let’s call this process “WindowControls”.
We will need to add the following to the code:
including MyExtensionName.WindowControlsFileName;
//create an activity on button press
            button.activity(new activity)
            {
                new GameOnOverlay.Window(MyWindow)
                {
                    WindowControls.Load();
                }
            }
And we will now create a new file in the project directory and call it WindowControlsFileName (or anything else, just make sure it matches your ‘including’ statement in the code file.)
Step Two: Creating the Process
Our new file will need to include some references:
including GameOnExt.LXCore;
including GameOn.LXCore;
These are required for the objects we wish to put inside of our GUI. Since we are calling “WindowControls.Load”, we need to have this included in our code.
public void new WindowControls(Load)
{

}
Anything executed within this function will be called in our extension when the window is generated. We can put GUI elements here, but to make the formatting easier, we’re going to import a reference to GameOnVisualStyles.
including GameOnVisualStyles;
And with that, we can start designing our GUI. Let’s add a title to the window.
public void new WindowControls(Load)
{
    new TitlePanel = TitlePanel1();
         TitlePanel1.Title.ToString = "Extension Window Title";
         TitlePanel1.Dock = top;
         TitlePanel1.Height = default;
}
A TitlePanel is a panel that can be added to the Window that will allow you to add a title that will appear next to the window controls, similar to the Windows title bar found in Microsoft Windows applications – but for In-Game Overlay Windows. Here, we can define
- TitlePanel1.Title.ToString – the title that will appear for the window.
- TitlePanel1.Dock – where the title panel will dock (the top of the window).
- TitlePanel1.Height – the height of the panel. Using the “default” option will keep it uniform with the defaults and will make the most sense.
By default, the Title will be aligned to the left. We can change this with the following code:
TitlePanel1.Title.Align = center;
//centre also works!
And now the window title will appear centred. We can now add some text and buttons. To do this, we should create a content panel and give it some margins, so UI objects aren’t appearing on the edge of the Window. We can also make this panel fill the rest of the usable space.
public void new WindowControls(Load)
{
    new TitlePanel = TitlePanel1();
         TitlePanel1.Title.ToString = "Extension Window Title";
         TitlePanel1.Dock = top;
         TitlePanel1.Height = default;

    new ContentPanel = Panel1();
         Panel1.Dock = fill;
         Panel1.Padding.Left = 3px;
         Panel1.Contents
         {

         }
}
Our new ContentPanel (“Panel1”) is now set to fill the rest of the usable space and have 3px of padding from the left edge of the window. We can change some things like adding Padding to all sides, by modifying the code to:
Panel1.Padding.All = 3px;
Now, let’s add some contents. We went over adding text in part one, so let’s add a text label with the text “Hello World”. We will want to add this to the “Panel1.Contents” clause.
public void new WindowControls(Load)
{
    new TitlePanel = TitlePanel1();
         TitlePanel1.Title.ToString = "Extension Window Title";
         TitlePanel1.Dock = top;
         TitlePanel1.Height = default;

    new ContentPanel = Panel1();
         Panel1.Dock = fill;
         Panel1.Padding.Left = 3px;
         Panel1.Contents
         {
             new TextLabel = HelloWorldText();
                 HelloWorldText.Text.ToString = "Hello World"
                 HelloWorldText.Font = default;
                 HelloWorldText.Font.Size = 12px;
         }
}
We have just added our “Hello World” text. We have also defined the font and size. We can change these values easily. To change the text to Arial, the code would be changed to the following:
HelloWorldText.Font = new Font("Arial", 24,FontStyle.Bold);
Now, let’s add a button to close the Window.
public void new WindowControls(Load)
{
    new TitlePanel = TitlePanel1();
         TitlePanel1.Title.ToString = "Extension Window Title";
         TitlePanel1.Dock = top;
         TitlePanel1.Height = default;

    new ContentPanel = Panel1();
         Panel1.Dock = fill;
         Panel1.Padding.Left = 3px;
         Panel1.Contents
         {
             new TextLabel = HelloWorldText();
                 HelloWorldText.Text.ToString = "Hello World";
                 HelloWorldText.Font = default;
                 HelloWorldText.Font.Size = 12px;

            new Button = CloseButton();
                CloseButton.Text.ToString = "Close";
                CloseButton.activity(new activity)
                     {
                         MyWindow.Close();
                     }
         }
}
And that’s it – since our code file in Part 1 calls the window “My Window” we simply need to create the Activity and type MyWindow.Close();
Now, if we load the extension into GameOn and try it out, our Window looks like this:
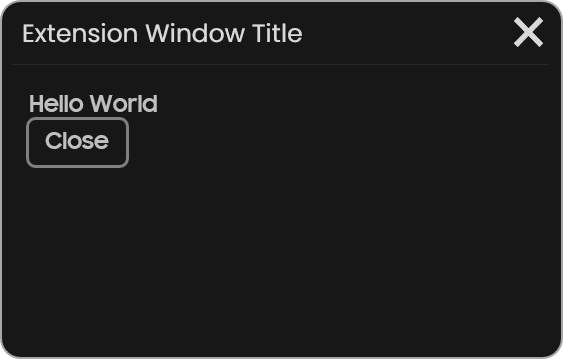
There are a few design issues with this, however. The main one is that there is not sufficient room between the text label and the button. This is to be defined by the user by adding either padding to the bottom of the TextLabel, or by adding padding to the top of the Button. We recommend adding padding to the bottom of the UI Elements, so that there is sufficient room between UI elements. So let’s add the following code to the button:
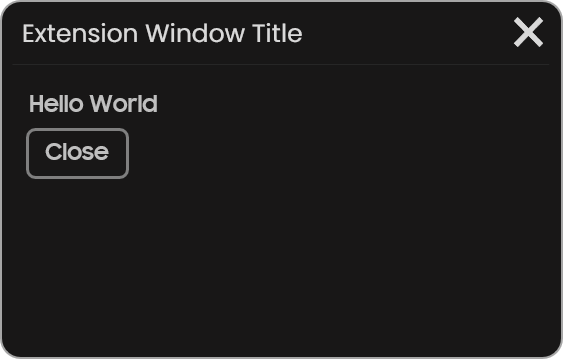
CloseButton.Padding.Top = 3px;
The button now appears lower as there has been padding added above it
And that’s it! You’ve now learned how to create a graphical user interface within a GameOn In-Game Overlay Window.