How to use FieldMate Personnel Training
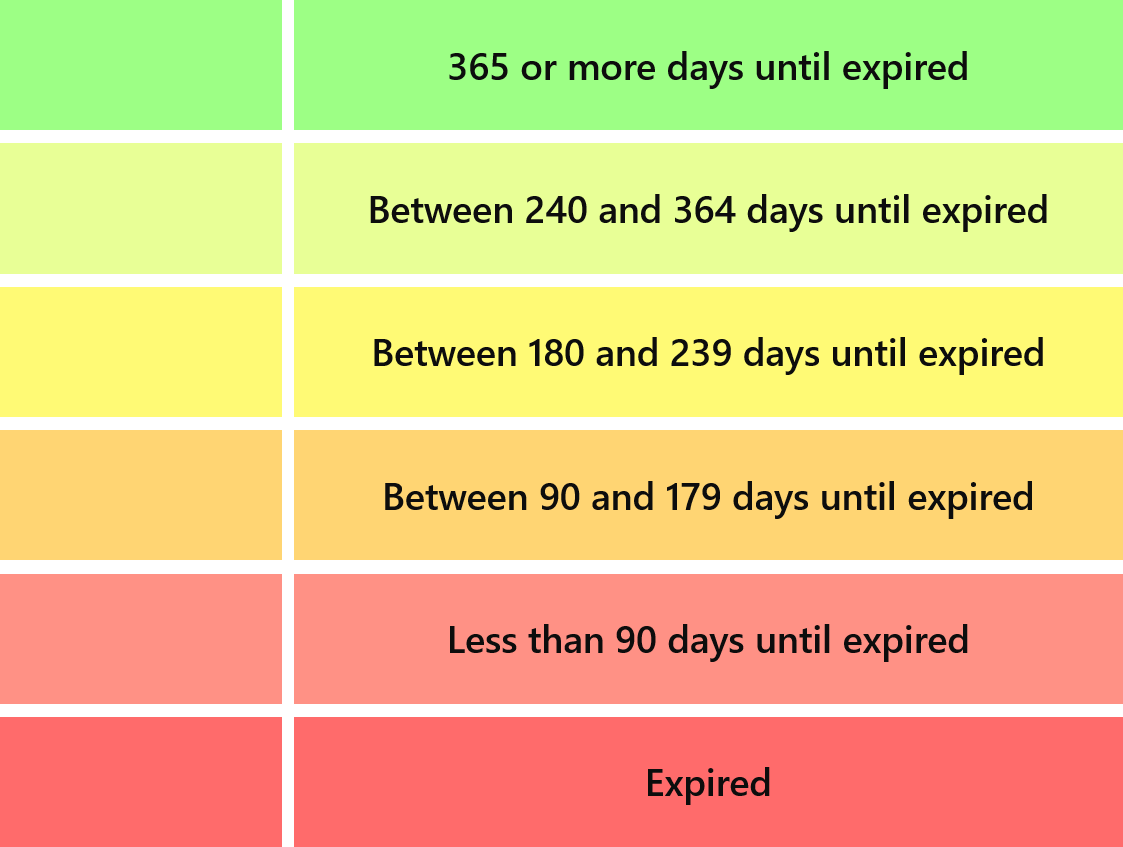
FieldMate Personnel Training includes the ability to automatically indicate how close someone’s qualification or license is to expiring using a set of colour coded conditional formatting. The application will mathematically determine how many days there are between the computer date and the date that is specified as the expiry date.
Once the application has calculated the amount of days between the computer date and the expiry date, it applies the following colours to the expiry date field.

Deleting a Row
To delete a row, simply highlight a cell within the row you wish to delete and click the DEL key on your keyboard. The row will be deleted. Before deleting any records, you may wish to click on “Backup Database”.
Adding a Row
To add a row to the database, simply scroll to the bottom of the available list. At the bottom of your records list, there should be a row with the text “Click here to add a new record”.

Simply click on this to generate a new blank row. You can now fill in the data and click “Save Changes” to save the data back to the database.
Copying a Row
FieldMate Personnel Training supports the ability to copy rows as tab delimited text. To do this, you can right click on any cell within a row and click “Copy Row”. You will then have the entire row saved to your clipboard. You can then paste it into a word processor to see the row in a tab delimited format. Since it is tab delimited, each column is separated by a tab space. This makes importing the row into another application or working file easy.
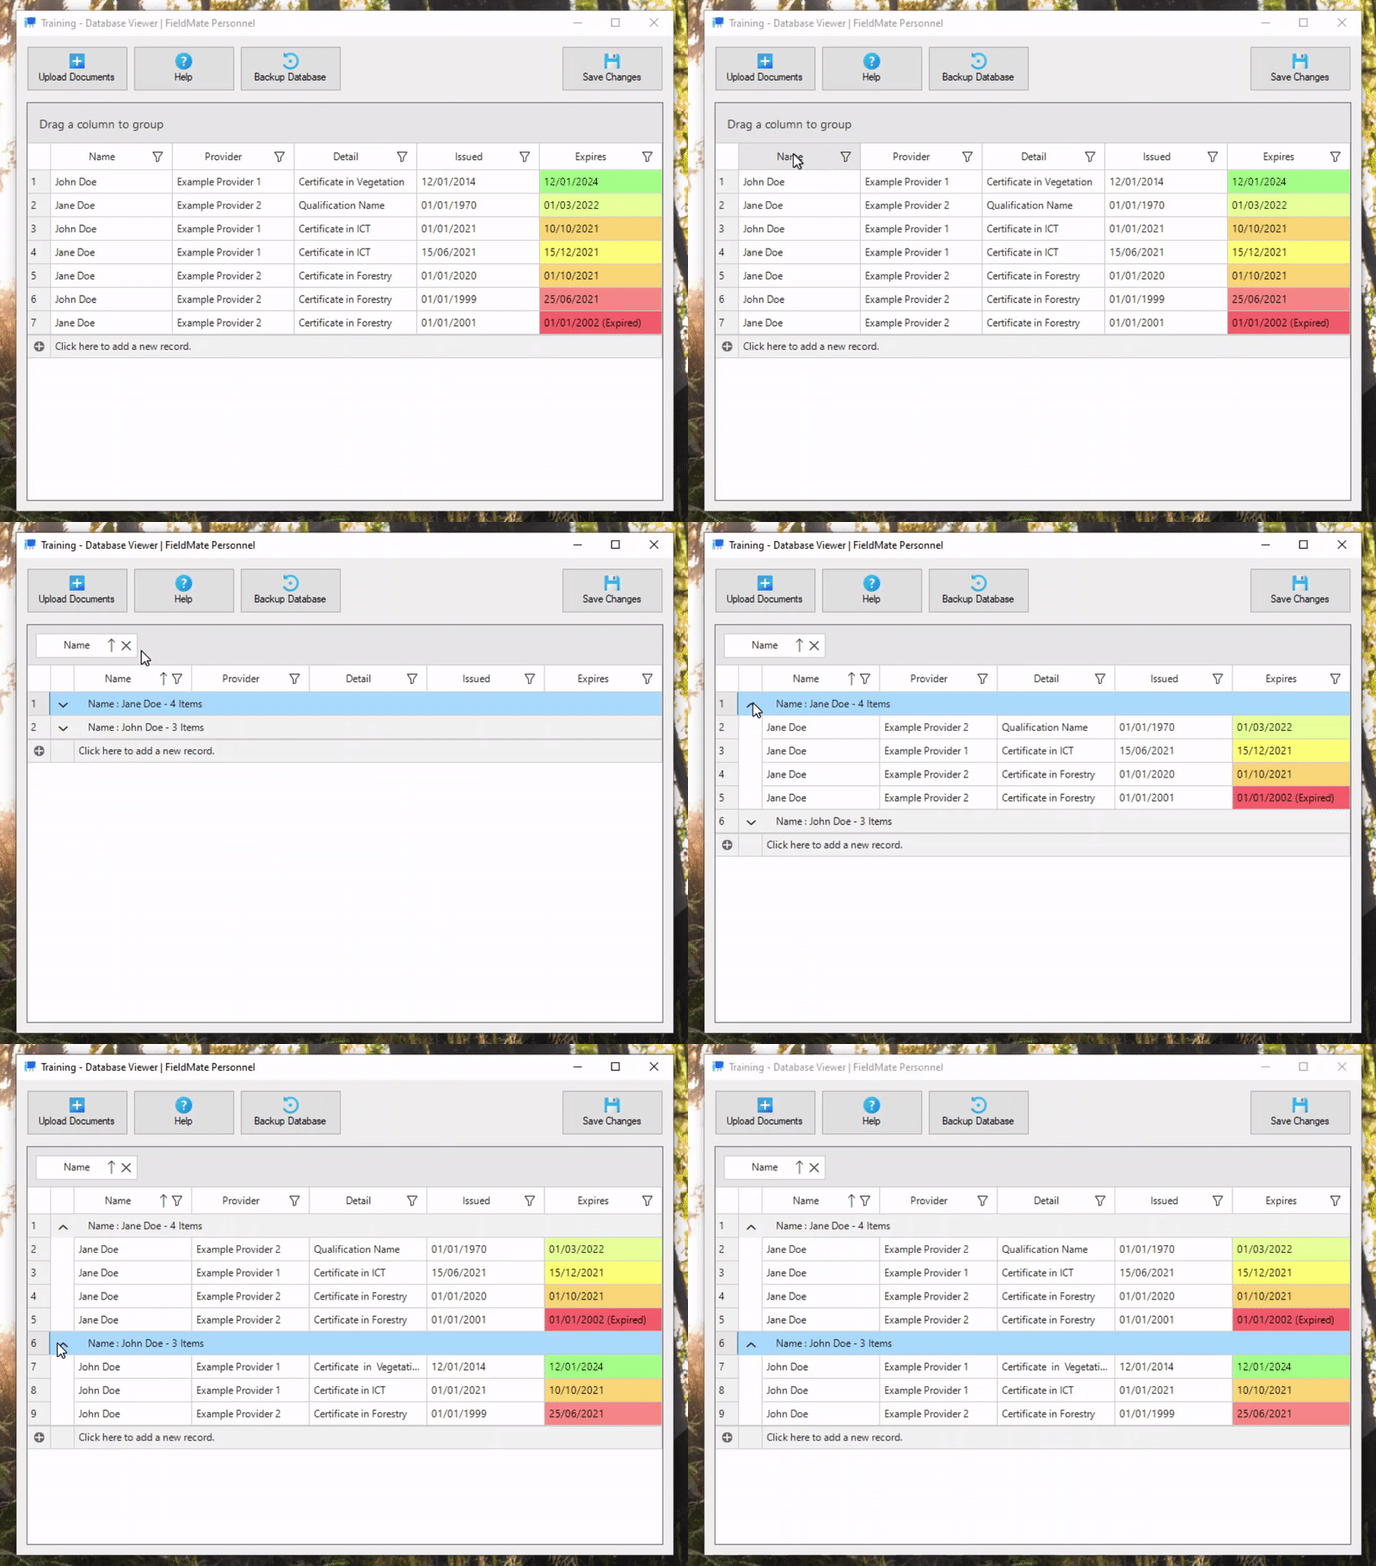
FieldMate Personnel Training has the ability to group data together based on data that is shared within a particular column. To group data, simply select the column that you wish to group (e.g. Name) and drag the column to the “Drag a column to group” row at the top of the database.

You will see that the application will intelligently group all data entries that share the same field within the column selected, for easier data visualisation.
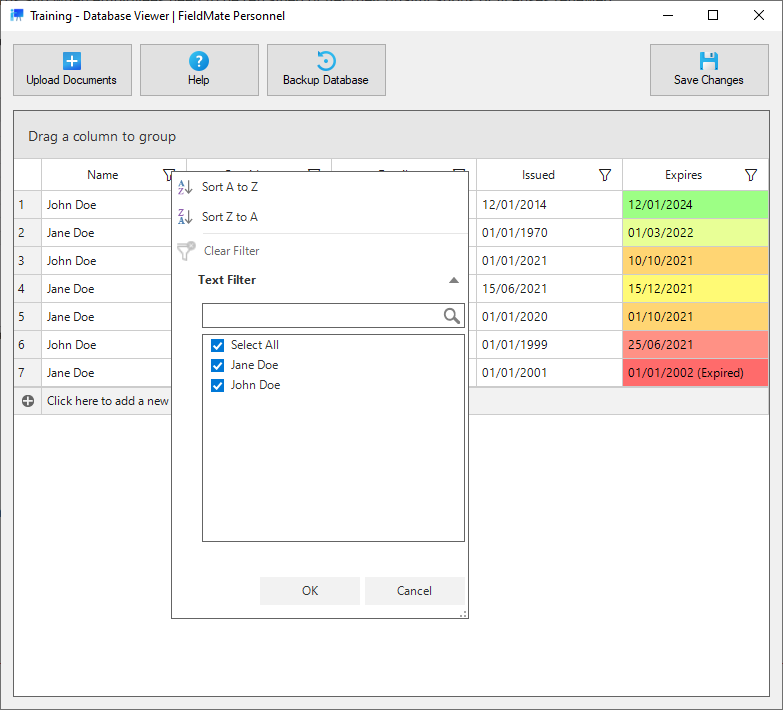
Data can be filtered through manually without the use of Smart Data Grouping by using the filter icon that appears in the Column header. The user can perform the following functions using the filter icon:
- Sort the data alphabetically in ascending and descending orders.
- Filter specific rows based on data found within the column (e.g. by name).
- Search among all data found within those columns.
- Clear any existing filters on that column.

When you are working with the database, changes are not made to the database directly – to ensure that data isn’t accidentally removed. Instead, when you work with the database you are using a local copy of the database that is stored within the data grid of the application. It is for this reason that when you have made your changes to the database, you can use the “Save Changes” button to save these directly to the database.
Even though your changes aren’t going to be made to the live database until you hit save, you might still find it beneficial to create a backup of the database before you make any changes. You can do this by clicking “Backup Database”. It will create a copy of the database as it was the last time it was saved before any changes were made. So even if you’re making changes, you can still click backup before you click save.
Backups are stored in a location defined by your systems administrator, so if you ever need to restore the data from a backup, speak to your systems administrator.

